Dying Light 2 is filled with weapons, items, and equipment of varying quality and rarity, but some of the game’s most interesting gear belongs to a tier best described as “Easter eggs.”
While Dying Light 2 features some of the most amusing, subtle, and creatively diverse Easter eggs that I’ve seen in a game in quite some time, the game’s best Easter eggs are often those that reward you with some special weapon or piece of equipment that produce effects that simply can’t be replicated. Some of those rewards are little more than memes, but some of these special items are powerful enough to pretty much break the game.
So while the hunt for Dying Light 2‘s Easter egg equipment continues (and we’ll be sure to update this article as new items are discovered), here is every Easter egg weapon and item that has been located so far.
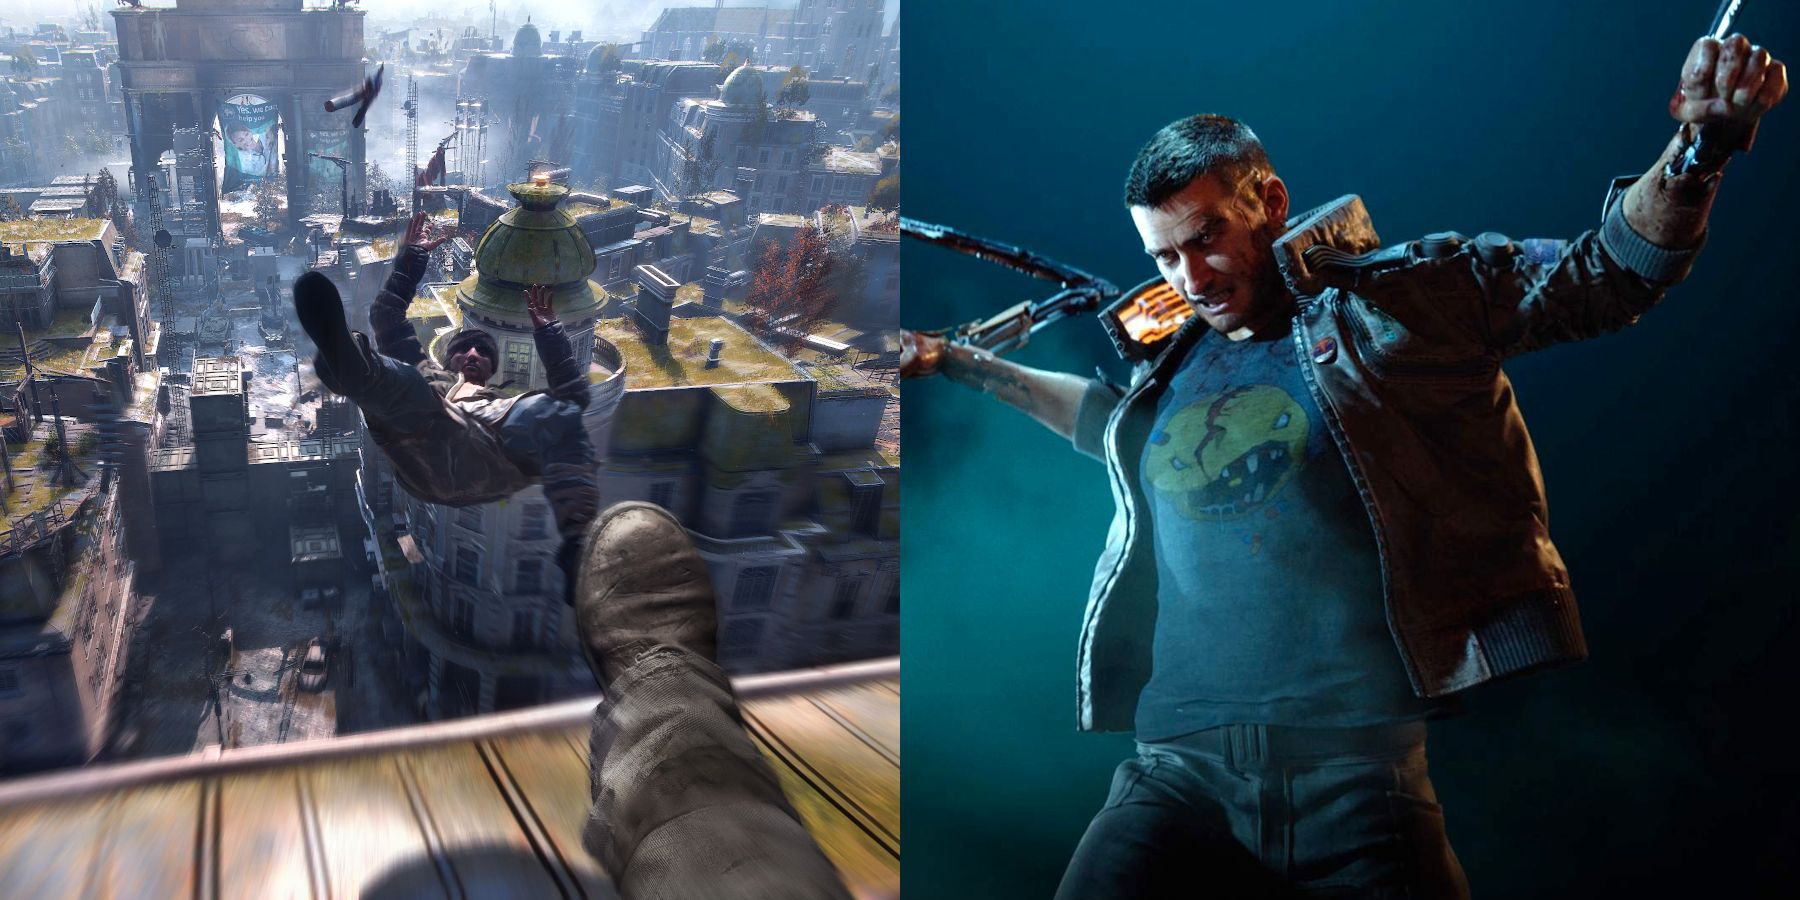
Dying Light 2 – Where to Find Cyber Hands 2177
In order to unlock this hilarious weapon, you’ll need to climb to the top of the VNC Tower. It’s technically possible to reach the roof from the outside, but you’re better off just waiting until you’ve completed Dying Light 2‘s “Broadcast” mission. That will grant you access to an elevator that takes you to the top.
Head to the southwest edge of the building’s roof. There, you should be able to use a glider to reach the nearby rooftop that is covered in moss and has a giant antenna sticking out of it. Once you’re on that rooftop, start climbing up the ducts on the south side of the roof until you’re able to glide to the building that should be right in front of you (it’s the one that is covered with trees). There should be an NPC on the top of that roof known simply as the “Liquidator” who will give you the blueprint for a weapon called “Cyber Hands 2177.”
These hand blades are a clear nod to Cyberpunk 2077‘s Matis Blades. They’re honestly not that great, but they’re pretty fun to use and certainly work in a pinch.
Dying Light 2 – Where to Find the Left Finger of gloVa
To get this weapon, you’ll also need to head to the top of the VNC Tower which, as we just noted, is easiest to get to if you’ve already completed the Broadcast mission. You’ll also want to jump on the same roof with the antenna sticking out of it that we referenced in the previous section.
On this roof, you’ll want to pull the cable out of the nearby green terminal and then drop down two levels. There, you’ll want to insert the cables into the red terminal. When that’s done, pull the cable out of the green terminal found on this level and jump down two more levels. Insert these cables into the red terminal you find on this level.
In this area, you’ll find yet another green box with even more cables in them. Pull the cables out of the green terminal, jump down to the terrace directly below you, then jump down to the next terrace you should now see below you. Insert the cables into the red box you’ll find in this area. If you’ve done everything right, you should be able to hit the switch next to this red box and open the nearby door.
Inside, you’ll find a bed with a teddy bear on it (as well as a ton of Easter eggs). Sleep on this bed, and the Techland poster on the wall should part and reveal a secret set of blueprints for the Left Finger of gloVa.
Your reward for finishing this massive task is arguably the best weapon in the game. Essentially just “finger guns,” this glove is basically a shotgun that decimates anything in your way. Sure, it costs 369 scrap to craft, and you only get 16 shots with it, but it’s hard to pass up the chance to hunt for this truly unique weapon.
Dying Light 2 – Where to Find the Infinite Weapon Durability Korek Charm
If you want to find the most useful item in Dying Light 2, you just need to head to the secret developer’s room where you find the blueprints for the Left Finger of gloVa. As noted above, it may take you quite some time to actually enter that room.
Once you’re there, sit on the cushions in the living room that have a red lantern on them. From there, sit on all of the other nearby cushions in the room in a counterclockwise motion. Some say they were able to unlock this item just by sitting on all of the cushions, but it’s probably best to try the counterclockwise method just to be safe.
If you did this right, you should notice that a blueprint for the Korek charm has appeared on the coffee table at the center of the cushions. This invaluable charm can be attached to any weapon to instantly restore 500 durability to it. Because you can use it as many times as you want on as many weapons as you want, it’s basically an infinite repair tool that ensures your weapons will never break. You will want to acquire this at some point in the game.
Read more
Dying Light 2: Peacekeepers vs. Survivors – Which Faction is Better?

15 Best PlayStation One RPGs Ever Made
Dying Light 2 – Where to Find the Pan of Destiny
It’s technically possible to get this weapon while you’re playing Dying Light 2‘s main story, but the easiest way to unlock it is to wait until you’ve reached the postgame.
In either case, you’ll want to head to the Renegade complex that you first see towards the end of the main story. There, look for a room that is barricaded by wood and contains a massive tank. Head up the staircase in that room until you reach another room with an orange tent inside. There, you should find a chicken in a cage. Talk to this chicken, and he’ll assign you a side quest called “Space Cock” that tasks you with finding a part for the chicken’s spaceship.
Follow the quest markers, retrieve the part, and return it to the chicken. He’ll teleport away shortly thereafter and leave you a blueprint for the Pan of Destiny on a nearby table for your troubles.
This weapon costs an absurd 369 scrap to craft and doesn’t do a lot of damage, but it will always return to you after you’ve thrown it at an enemy. It’s essentially a throwable weapon with unlimited uses, which makes it one of the most valuable weapons in the game by some distance.
Dying Light 2 – Where to Find the Flying Broom
This isn’t actually a weapon, but we can’t leave without talking about this flyable broom.
Take the elevator to the top of VNC Tower and head to the east edge of the roof. Look down, and you should see a rooftop with a crane on it. You should be able to reach the roof with a glider and then reach the top of the crane via grappling hooks.
There, you should spot some blue mushrooms. Keep interacting with those mushrooms until you unlock a Parkour challenge (this will take quite a while, so be patient). This particular challenge (the “Baba Yaga”) will see you fly around the city on a broomstick. You won’t be able to keep the broom outside of the challenge, but you can use it to reach some of the nearby rooftops that feature other rare blueprints.
Dying Light 2 – Where to Find the United in Fun – Everyone Can Play Blueprints
To find this bizarre and well-hidden item, head to the Community Soccer Field in the Trinity area. Once you are there, look for a soccer ball.
Move that soccer ball into the nearby goal via whatever methods are available to you and leave the area. Return to the soccer field and “score” another goal. Repeat this method until you’ve scored nine goals (you’ll need to leave the area after every score). After you’ve scored the final goal, the goalposts should light up and produce a giant dancing zombie. Kill this zombie, and you’ll soon be rewarded with the “United in Fun – Everyone Can Play” blueprint.
This 369 scrap blueprint rewards you with a soccer ball that doubles as a throwable weapon that can temporarily stun enemies. It’s not great, but it’s pretty fun to unlock.
Dying Light 2 – Where to Find the It’s Me… Marian! Triple Jump Shoes
Again, these shoes aren’t a weapon, but they’re absolutely one of those hidden items that are worth going out of your way to look for.
Head to the Lower Dam Ayre part of the map (you’ll need to unlock this area a little later in the game) and look for the giant crate suspended by a crane. Climb your way up to the crate, and you’ll notice that it has a locked door on it that you’ll need to pick. Inside is a room designed to pay tribute to Dying Light protagonist Kyle Crane.
There are quite a few incredible Easter eggs in this room, but the one you really want can be found by activating the music player and sitting on the nearby cousins. When the audio is done, you should notice that a gift has magically appeared in the room. Inside, you should find the “It’s me…Marian!” sneakers.
These sneakers not only increase your jump height but allow you to perform a cinematic “triple jump” accompanied by recognizable Super Mario sound effects. They’re a lot of fun to play around with and are occasionally more useful than you may initially think they will be.
Dying Light 2 – Where to Find the Hoverboard
This is another item that you won’t be able to keep (and is incredibly difficult to find), but how can I walk away without telling you how to find Dying Light 2‘s best (and possibly only) tribute to Back to the Future 2?
Before you’re able to ride Dying Light 2‘s hoverboard, you’ll need to complete an elaborate series of steps that eventually unlock a very special challenge. It’s one of the most difficult items to find in the game, which is why I would highly recommend checking out this video from the Arekkz Gaming YouTube channel that does a fantastic job of showing you exactly what you need to do to get it:
Your reward for completing this daunting task is a Parkour challenge that requires you to navigate a waterway filled with obstacles. You won’t be able to keep the hoverboard when you’re done, but the challenge itself is a lot of fun, and the process of unlocking it is honestly an epic adventure in its own right.